
I’m not real fond of the snap-setting step in diaper making, but it’s a necessary evil. The other night I was applying some snapstitle=” after threatening myself with no chocolate until they were done and everything was going along smoothly when suddenly I heard a faint CRACK.
My stomach dropped and I bit back a few choice four-letter words. I knew what that CRACK meant; that snap had to come out.
Oh %&!#.
 Sometimes snaps crack because there’s too much pressure on the snap press handle, but sometimes it’s just a faulty snap. Either way you can’t just leave it there.
I’ve heard that you can remove a snap by using an ice pick and hammer to push the post back, or drilling the center out with a small drill bit, but I’m not big into power tools and don’t have an ice pick hanging around. I like to use my Teacher’s trusty wire cutters.
It’s a slow process but usually does the job with minimal damage to the fabric.
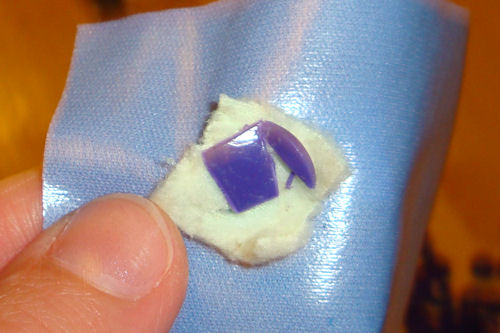
 I usually start on the cap side to protect the front of the fabric as much as possible. Place the wire cutters with the cutting edge against the fabric; try not get any fabric caught in the cutters.
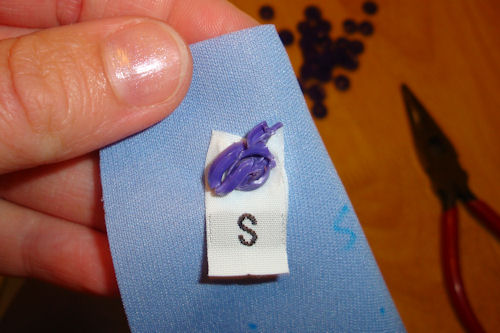
That scrap fabric between the snap cap and the PUL was intended to reinforce the snap but will also help protect the PUL as I’m working on this snap.
 With the wire cutters, try to crack the cap, or at least do some damage to it. By the way – make sure your fingers are out of the way before you try to crack the cap. Again, the voice of experience talking…
 Turn the fabric over and have a go at the socket side. Sometimes it’s easier to get under the socket and snip through the post.
 Sometimes not so much.
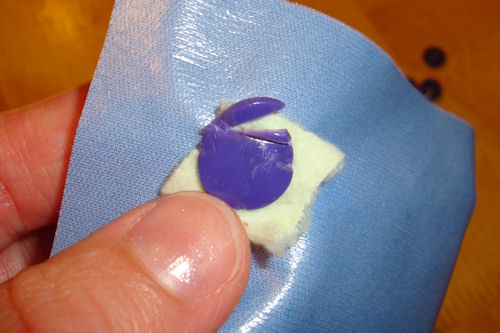
What you do NOT want to do is cut off all of the socket except for the back layer which is against the fabric. In the photo you can see how the bottom part is starting do to just that – and it’s not a good thing.
 Back to the cap… Since pieces are obviously too tightly set for me to get to the post I have to try another option.
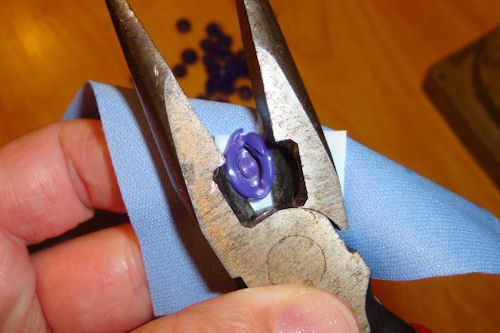
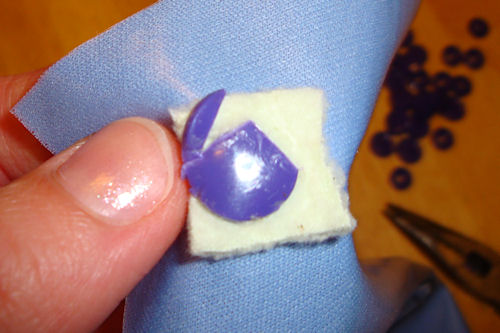
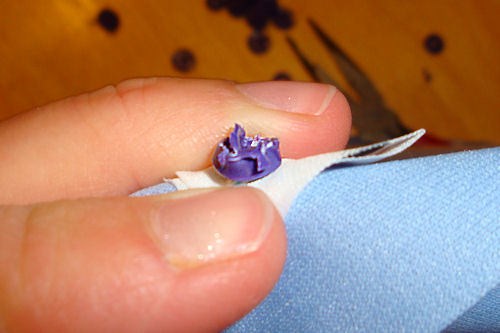
Grabbing one edge of the cap in the wire cutters and making sure not to catch any fabric I started chipping away at the cap.
 Piece…
 by piece…
 we’re getting there…
As you’re chipping away at the cap don’t get too close to the post. If you cut off the whole cap except a bit attached to the post you’ll have no way to get it out without leaving huge hole in your fabric. This is the voice of experience talking.
What you’re trying to do is get rid of enough cap and/or socket so you can reach the post with the wire cutters.
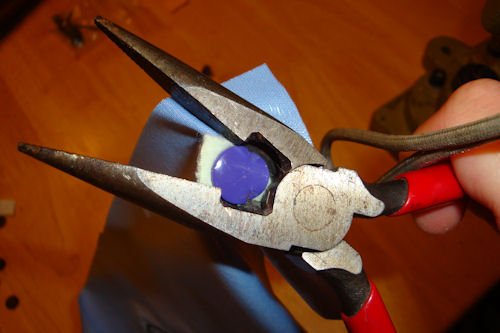
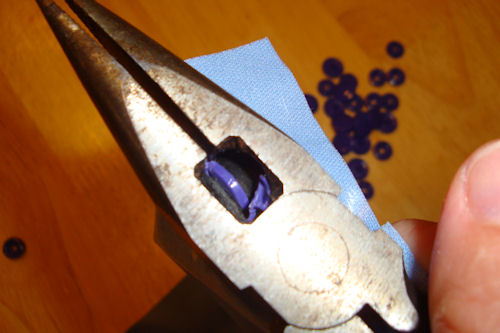
 Back to the socket side… push up on the cap to pop the socket up and away from the fabric.
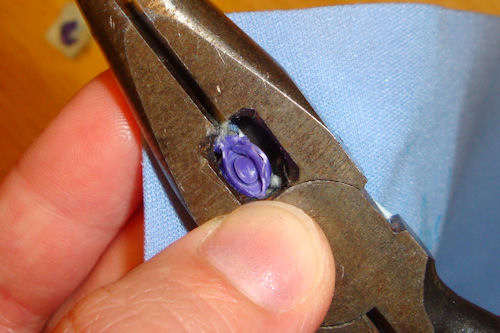 Carefully place the wire cutter blades underneath the socket, without catching the fabric.
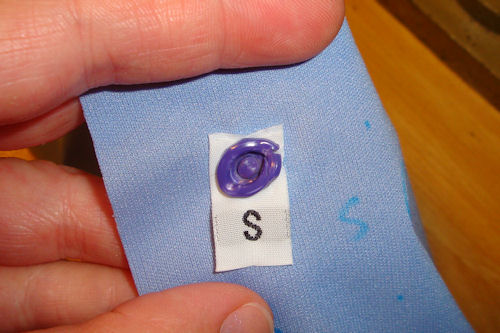
I’m lucky to have the tag there; it’s protecting the fabric and if it gets wrecked it’s easier to replace than the whole diaper cut. If I didn’t have the tag I’d do this from the cap side, but I know the tag will protect the PUL better than the scrap fabric – plus the socket is smaller so it’ll be easier to get to the post.
Slowly, bear down to cut through the post, and…
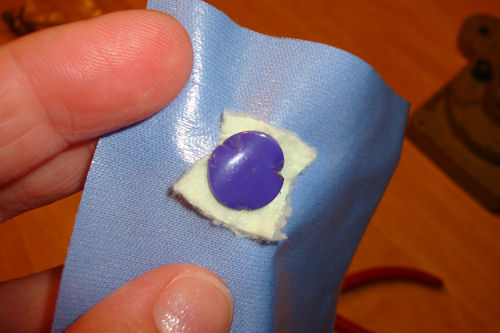
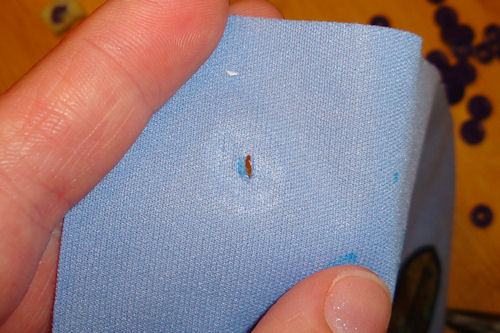 Voilà, the snap is out!
The hole left by the snap isn’t too big so I’ll just grab a new tag and piece of scrap paper, then replace the snap.
That wasn’t so hard now, was it? Hopefully the snaps you need to remove will be few and far between!


I just wanted to add that I’ve found a soldering iron to be an incredibly quick method for removing faulty snaps! You just heat it up, press it down on the center post (the side opposite of the cap head) and it melts away. Pull the two sides of plastic apart while they’re still hot (so they don’t cool and re-set). Make sure you have somewhere safe to place the soldering iron and the gooey plastic pieces. The only time I’ve had issue with this method is when my soldering iron wasn’t hot enough.
Suzy,
What a great idea! I don’t have a soldering iron, but I wonder if the tip of a hot glue gun would get hot enough… I’ll have to try it. Thanks for the great tip!
~Amy Sue
Thank you for posting this random, but incredibly helpful tutorial. I recently tried the much less sophisticated “smash it with a hammer!” technique, resulting in a huge hole in the PUL, which resulted in a ruined diaper that I’d already spent half an hour on, which resulted in a multitude of profanities as I worked through the stages of grief.
Emily,
I feel your pain. I have to admit this technique isn’t fool-proof; I’ve ripped holes in the PUL before too, but if you’re slow and careful you should be OK. 🙂
I’ve also heard of another method, where you use a drill with a small bit to drill out the center of the snap, but power tools scare me so I haven’t tried that one yet.
Thanks for commenting!
~Amy Sue
This worked perfectly and saved a boutique bib. Thank-you
Glad to have helped!