
The other day I showed you how to make reusable cloth gift bags. After I finished the gift bag and had the photos taken I put everything away and headed up to bed. But I wasn’t feeling my usual sense of accomplishment.
Then the little voice in my head spoke up…
“I don’t like them.”
I don’t like it when the little voice in my head speaks up. It usually means more work for me.
“Why not?” I answered. “They’re cute bags. And they’re quick and easy to make.”
“The ribbon is too hard to wrap around and tie. The tops are clunky and ugly. I don’t like them.”
“But I’ve got a bunch of them done already.” I whined. “The tutorial photos are taken; I just need to write up the directions.”
“I don’t like them.”
“I don’t care! I don’t have time to make them over again. They’re good enough. Leave me alone!”
“They are not good enough. You can do better.”
“Stop it! There’s nothing wrong with them! They’re fine!”
“I. Don’t. Like. Them.”
“Arrrrrgh!!!”
I should know better than to argue with the voice in my head; I always lose. The next night I found myself changing the reusable bags I’d already made to make them better.
Make Reusable Gift Bags with a Casing
The reusable gift bags in my previous tutorial closed by wrapping a ribbon around the top. The voice in my head wasn’t thrilled with that option, so I took the ribbon off and made a casing for the ribbon to go through. When you pull the ribbon to close the bag the fabric will gather evenly and make a pretty ruffle on top.
Make Reusable Gift Bags from the Beginning
If you haven’t made any bags yet, follow the other tutorial except after you stitch the hem in Step 6 come back here to Step 2 and follow the rest of the steps to finish your gift bag.
Alter Previously Made Reusable Gift Bags
If you’ve already made gift bags from the other tutorial you can easily alter them by following the directions below.
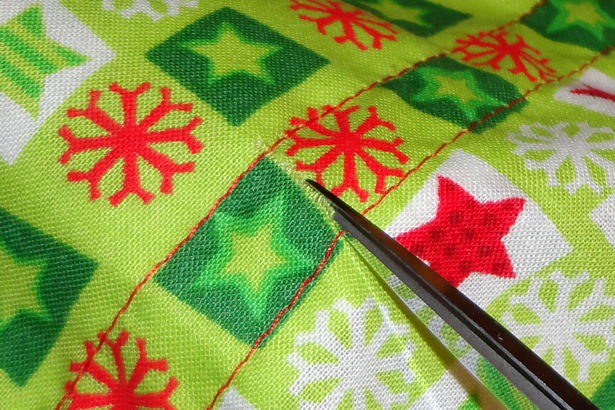
Step 1: Remove Ribbon
 Find where the ribbon is stitched to the bag in the final step of the previous tutorial.
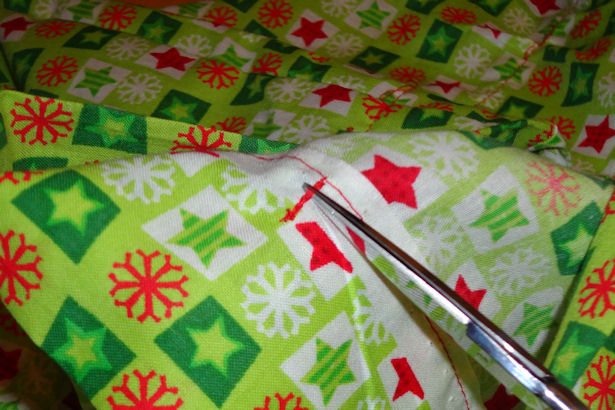 Carefully rip out the stitching so you can remove the ribbon.
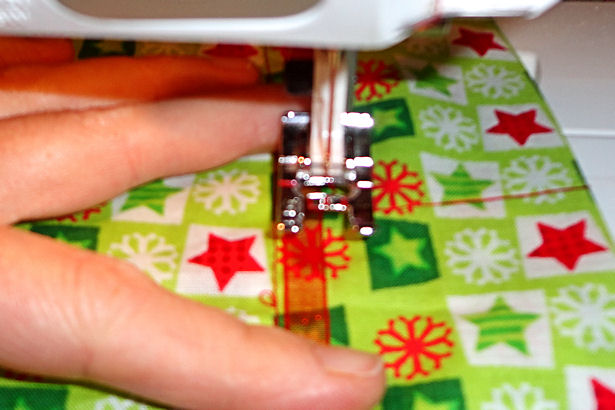
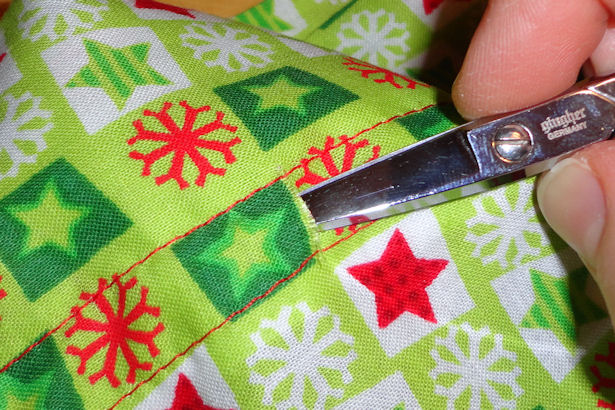
Step 2: Make Casing
 Lay the ribbon next to the stitching on the side near the top of the bag to figure out how wide to make the casing. You can measure with a measuring tape too, but this method is quicker for me.
 Set the ribbon aside and sew a second line of stitching parallel to the first line, to form a casing.
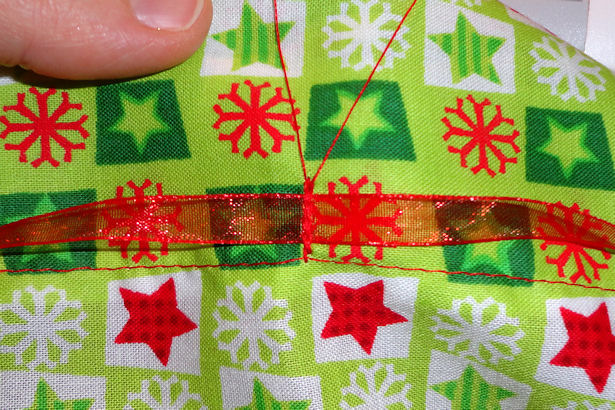
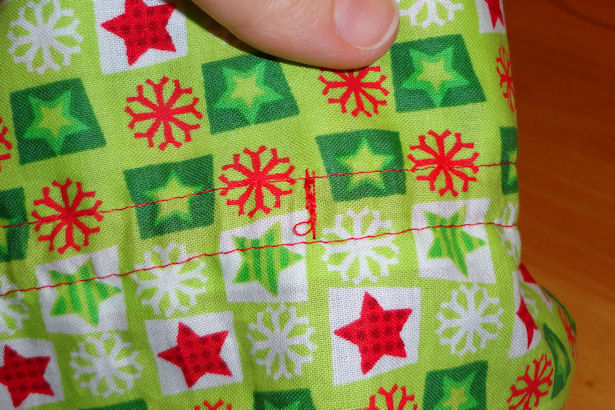
 Carefully separate the two layers of fabric and make a small slit in the outside layer of fabric. Be careful not to go through both layers of fabric!
I’d considered making a buttonhole for the ribbon but decided not to because I hate making buttonholes and because I doubt that the reusable gift bags are going to be used enough that they’ll need a buttonhole. If you’re worried about the fabric raveling you can brush a little clear nail polish on the edges of the slit, but be careful they don’t get stuck together.
 This is the opening you’re going to insert the ribbon into.
Step 3: Insert Ribbon
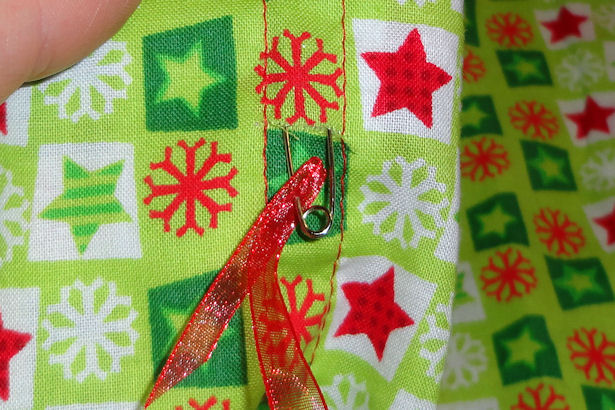
Fold the end of your ribbon over and attach a safety pin to it. Insert the ribbon into the slit in your casing and work it all the way around the bag. Be careful not to pull the ribbon all the way through the bag as it moves the casing!
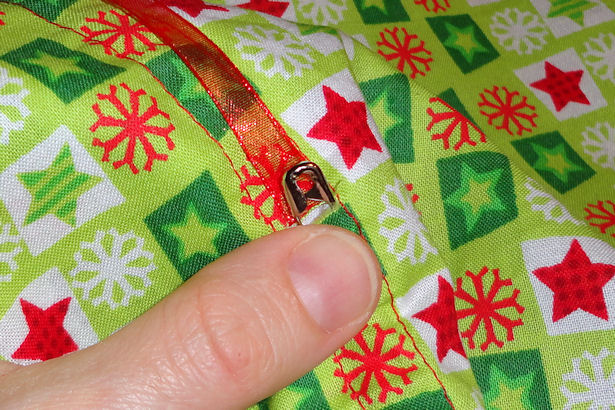 Work the pin and ribbon out of the slit – again being careful the other end of the ribbon doesn’t slip into the casing – and remove the pin.
 Find the middle of the bag back and stitch through the ribbon and casing to attach the ribbon to the bag so it doesn’t accidentally get pulled out.
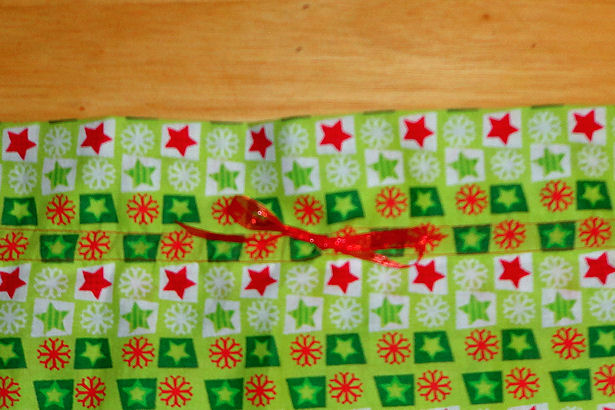 Trim both ends of the ribbon at an angle so they don’t fray and tie into a cute bow.
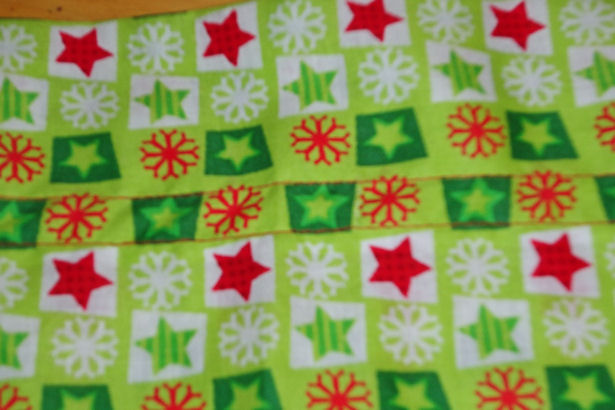
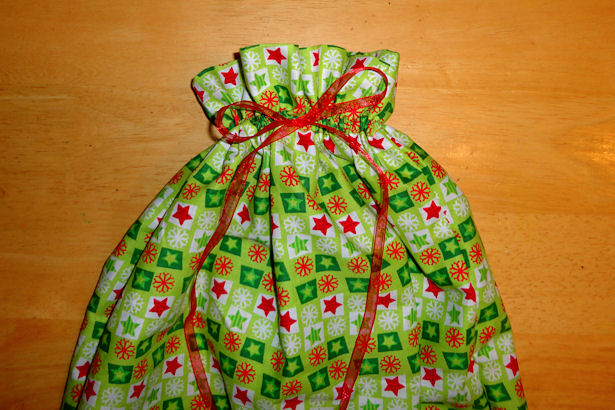 See, isn’t this top gathered more nicely than the other?
Happy Sewing!


Pingback: Make Kids Pajama Pants