
When my beloved leather checkbook cover started looking like something the cat dragged in I knew it was time to get a new one. I had recently made myself a new purse so I decided to make a checkbook cover to match.
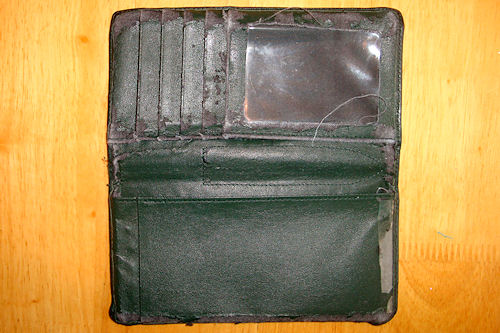 RIP poor, old checkbook cover. You served me well.
I loved the basic design of my old checkbook cover but needed more space for coupons, discount cards, photos, etc, so I used the old one as a model. I liked the driver’s license “window” and pulled the plastic out to use in the new checkbook cover.
After measuring, cutting, pressing, and sewing the first attempt ended up being an epic failure. I didn’t account for the space all those coupons, discount cards, photos and etc would use so it ended up too small. And I accidentally ironed over part of the driver’s license window and melted the plastic. Bummer!
I remeasured, cut, pressed and sewed again, making the entire thing a little bigger. Since I’d melted the original plastic I had to find another alternative and after thinking about it a while I remembered a length of laminating film I’d cut from a poster I’d had laminated a while ago. I cut a rectangle from the laminating film, basted it into the driver’s license window and voilà – good as new!
Since this was my first attempt at a checkbook cover I didn’t take step-by-step photos to write a tutorial, but I did take a couple of photos when it was done.
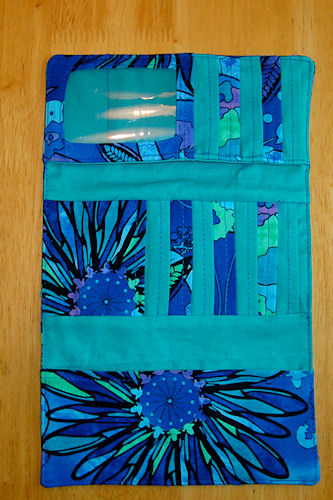 Here’s what I ended up with – doesn’t it look great?
The bottom section is the three sets of checks I usually carry with me; one for the daycare, one for the diaper business and one for family stuff.
The middle and top sections have lots of places for coupons, discount cards, photos, etc. My old checkbook cover didn’t have enough slots for the gazillions I usually have, which is why I added a third section to the new cover.
The top section also has the driver’s license window and an opening at the bottom for the kids’ immunization records. I’ve always carried the charts in my purse so I’d have them when I needed them.
I was very proud to think of putting the driver’s license upside-down, so when I’m writing a check I don’t have to flip the checkbook cover around for the clerk to see.
It’s better than my first attempt, but still not perfect; the credit card slots on the far right in both middle and top sections are too close to the outer edge, so next time I’ll either leave those out or move them all more towards the left. The driver’s license window is a bit wonky on the left too. I’ll have to experiment to figure out how fix that.
I decided not to add a section for cash and change – partly because I have a purple coin purse I just love, and partly because I was worried about how thick it would be when folded with the three sections. It was a good decision; it’s a good 1 1/2 – 2 inches thick when it’s folded up.
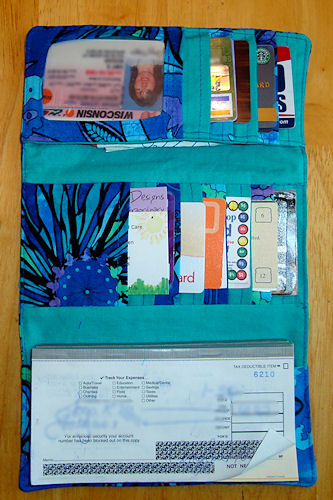 Here it is filled with all my junk. No fair laughing at the old driver’s license photo – it’s from when we first moved to Wisconsin, way back in 1999.
So far it’s working out great! I don’t regret not putting any closure on, or adding that fourth section. Next time I make a purse I’ll use the same basic pattern to make a matching checkbook cover – assuming I can find where I stashed the pattern…


You did such a great job on this checkbook cover, I absolutely love it. I have been looking around for a checkbook cover tutorial but haven’t been able to find one that I really liked yet, until I come across this one, but sadly you don’t have a tutorial for it. :(. Is there any way that you might be able to make a tutorial for it please? I’d be too afraid to try to make a go of it on my own, lol. If you are able to get a tutorial made for it, can you please shoot me a mail and let me know? Thank you in advance. Great job on that checkbook cover again.
Maria,
Here’s the thing… I’d actually planned to make up a test checkbook cover then do a tutorial, but the first checkbook cover was so awful it ended up in the garbage. The second one worked out better but by the time I was done with it I’d put so much blood, sweat, tears and 4-letter words into it that I didn’t want to even think about making another one, LOL!
The best advice I have for you is to take a checkbook cover you love, figure out how it’s made – what all the parts are – them measure everything carefully and draw it all out on graph paper. Remember to add a seam allowance! If you’re not sure about your measurements you can cut the pieces out of paper – minus the seam allowances – and tape them together like you’d sew them. (If I’d done that the first time it would’ve saved me a headache!)
Another (easier) options is to see if any of these free wallet patterns would work, or could be modified to what you’re looking for:
that*darn*kat
Tipnut Wallet Patterns
Gizmo Wallet (I’m going to try this one!)
Good luck and happy sewing!
~Amy Sue